

How to Prepare for a Plumber: 7 Steps Homeowners Need

Table of Contents
- Why Preparing for a Plumber Saves You Time and Money
- Step 1: Clear the Work Area and Remove Obstacles
- Step 2: Locate Your Emergency Water Shut Off Valve
- Step 3: Use a Plumbing Repair Preparation Checklist
- Step 4: Know What to Tell Your Plumber Before the Visit
- Step 5: Prepare Your Home for Pets and Children
- Step 6: Document the Problem and Set Up Payment
- Conclusion
- Frequently Asked Questions
Last Updated: September 19, 2026
Why Preparing for a Plumber Saves You Time and Money
Knowing how to prepare for plumber visits starts with one simple idea: a clear, ready workspace means faster diagnosis and fewer surprises. At Brass Tacks Plumbing, we see it every week. Homeowners in Plymouth and across the West Metro who spend ten minutes getting ready often save themselves an hour of billed labor.
- A clear path to the fixture
- Known shut-off valve locations
- A written description of the problem
- Pets and kids safely out of the way
- Photos and a plan for payment
The single biggest time-saver is a clear work area. Technicians who can reach pipes and fixtures without moving furniture finish faster, and you pay for less time.
Step 1: Clear the Work Area and Remove Obstacles
Clearing the work area means removing everything between your front door and the problem fixture. That includes boxes, rugs, furniture, and fragile decor. A clean path lets your plumber carry tools in without dodging your belongings.
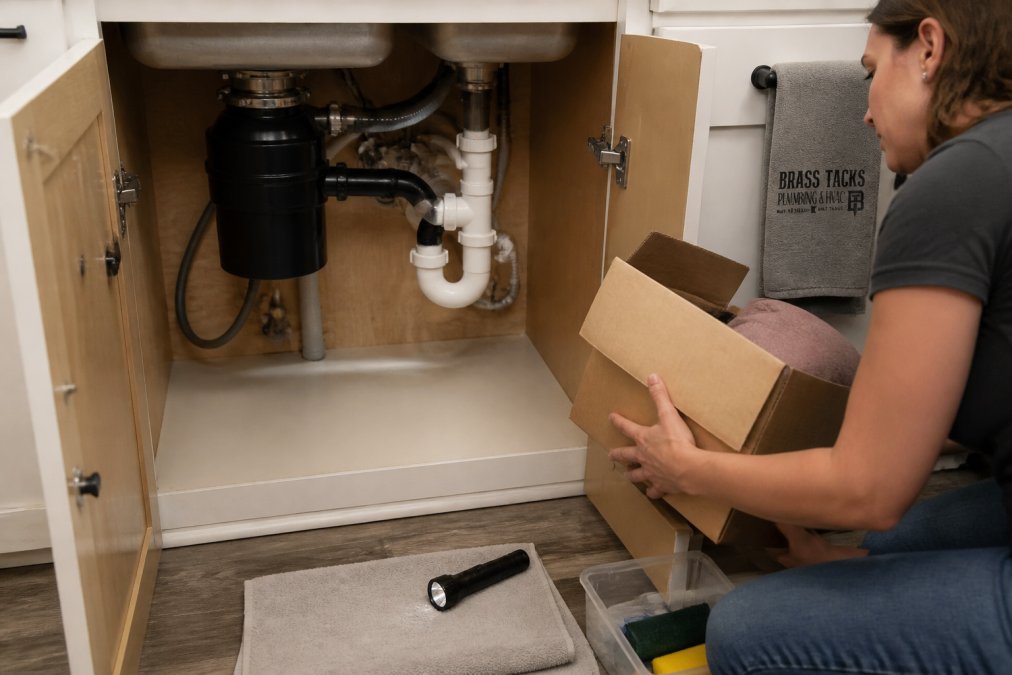
Clearing Access to Plumbing Pipes and Fixtures
Pipes often hide behind cabinet doors, appliances, or stored items. Give your plumber at least a few feet of open space around every visible pipe and valve. In older Minnesota homes, basement and crawlspace access matters too.
Protecting Floors, Furniture, and Fragile Items
Plumbing work can involve water, tools, and minor drips. Move rugs, electronics, and anything valuable out of the splash zone. Lay down old towels near the fixture if you have them.
Step 2: Locate Your Emergency Water Shut Off Valve
The emergency water shut off valve is the single most important thing to find before any plumbing visit. It stops water fast if a repair goes sideways. Every homeowner should know where theirs is and how to turn it.
If you cannot find your main shut-off valve, do not wait for an emergency to look. In a burst-pipe situation, every minute of searching means more water in your walls. Walk your home this week and tag the valve.
Where to Look for the Main Valve
Start where the water service line enters the home. Common spots include:
- The basement wall facing the street
- A utility room near the water heater and furnace
- A crawlspace access point
- A closet or mechanical chase on the lowest level
- Outside in a curb-stop box near the property line, in some setups
Fixture-Level Shut-Off Valves Worth Knowing
Beyond the main, every homeowner should know these small valves:
- Under each sink: two valves, one for hot and one for cold
- Behind each toilet: one valve on the wall or floor near the base
- Behind the washing machine: two valves in a recessed box
- At the water heater: a valve on the cold inlet line
- At the refrigerator ice maker: a saddle or inline valve, often behind the unit
- At outdoor hose bibs: a shut-off inside the house for winter
Testing Your Main Valve Before You Need It
A valve that has not been turned in years can seize. Test yours gently:
- Pick a weekday when no one needs water for 15 minutes.
- Turn the handle clockwise until it stops. Do not force it.
- Open a cold tap to confirm water stops.
- Turn the valve back counterclockwise to restore flow.
- Check around the valve for drips.
Why This Matters More in Cold Weather
When temperatures drop below freezing for extended stretches, the risk of a split pipe rises. Pipes in exterior walls, unheated crawlspaces, garages, and along rim joists are the usual suspects. If a pipe bursts, the main valve is your first line of defense. Knowing it cold, before the emergency, is what keeps a small repair from becoming a flooded basement.
Step 3: Use a Plumbing Repair Preparation Checklist
A checklist to prepare for plumber visits keeps you from forgetting small things that slow the visit. Run through it the day before your appointment. It takes about ten minutes.
Here is the checklist we suggest to homeowners:
- Clear the path from door to fixture
- Empty cabinets under sinks
- Move rugs, pets, and fragile items
- Locate the main shut-off valve
- Write down the problem symptoms
- Take photos or a short video
- Note when the problem started
- Set aside payment method and any service records
- Confirm parking and gate access
- Secure pets in a separate room
Step 4: Know What to Tell Your Plumber Before the Visit
“Hi, this is [your name] at [address]. My kitchen sink has been draining slowly for about a week, and now there is water pooling under the cabinet. I have not used any drain cleaner. The main shut-off valve is in the basement and it works. I can send photos.”
A few details worth mentioning:
- Unusual noises, like banging or gurgling
- Water color or smell changes
- Recent cold snaps or frozen pipes
- Any prior repairs to the same fixture
Step 5: Prepare Your Home for Pets and Children
Preparing your home for pets and children is a safety step, not just a courtesy. Curious pets can bolt through an open door. Kids can wander into a work zone with sharp tools and hot water.
A few more safety basics:
- Keep the work area off-limits during the visit
- Move cleaning chemicals and medications out of reach
- Warn your technician about nervous or territorial pets
- Clear trip hazards like toys and cords
Step 6: Document the Problem and Set Up Payment
Documenting the problem means taking photos and a short video before your plumber arrives. Photos of the leak, the fixture, and the shut-off valve help your technician arrive prepared. A 30-second video of a dripping pipe can be worth more than a paragraph of description.
What to Capture Before the Visit
Aim for a small, organized set of images rather than a dozen random shots:
- A wide shot of the room, so the technician understands the layout
- A close shot of the fixture itself
- A close shot of any visible leak, drip, or water stain
- A shot of the shut-off valve with the handle position visible
- A shot of any water damage, bubbling paint, or soft drywall
- Model and serial number plates on water heaters, softeners, or sump pumps
- A photo of the breaker or disconnect if the issue involves a powered unit
Take photos before and after the repair. Before photos help with diagnosis. After photos give you a record for warranties, insurance, or future service calls. Save them in a folder named for the date and fixture so you can find them later.
Why Digital Evidence Helps You, Not Just the Plumber
A clear photo set does three things:
- It helps the office route the right technician and stock the right parts.
- It gives you a record if the same issue returns.
- It supports an insurance claim if water damage spreads.
If you are a landlord or manage a rental, this record also documents the condition of the unit before and after service.
Preparing for Payment and Budget Questions
Ask about pricing when you book, not when the technician is packing up. A few things to sort out ahead of time:
- Ask whether the company charges a diagnostic or trip fee, and whether it is applied to the repair.
- Ask for the pricing structure: flat rate per job, hourly, or a combination.
- Ask what forms of payment are accepted, including card, check, and any financing options.
- Ask whether an estimate can be provided before work begins, and whether it is written.
- Ask how change orders are handled if the technician finds a second problem.
- Confirm whether the company bills to a landlord, property manager, or warranty company if that applies.
A Quick Budget Prep Checklist
- Confirm the diagnostic or trip fee policy
- Ask for the pricing structure in writing if possible
- Confirm accepted payment methods
- Ask about financing for larger jobs like water heater replacement
- Set aside a payment method before the visit
- Gather any prior invoices or service records for the same fixture
- Note your home warranty or insurance info if relevant
If the job may involve a water heater, our water heater repair page explains what to expect. For broader plumbing questions, start with plumbing services.
Conclusion
A plumbing problem is stressful enough without a chaotic house adding to it. Ten minutes of prep, a clear path, a known shut-off valve, and a few good photos can turn a stressful visit into a smooth one.
Frequently Asked Questions
What should I do before a plumber arrives?
Clear the work area around the fixture, remove fragile items, and make sure there is a clear path to the problem. If you can, locate your emergency water shut off valve and turn off the water supply to prevent further damage. Write down when the problem started and any symptoms you noticed. Secure pets and keep children away from the work zone. These steps help your plumber diagnose the issue faster and get to work without delays.
Do I need to be home when a plumber is working?
For most residential plumbing repairs, someone 18 or older should be home to provide access, answer questions, and approve the work. If you cannot be there, arrange for a trusted neighbor or family member to let the plumber in and stay during the visit. Being present also lets you point out the exact problem, ask about the diagnosis, and review the estimate before any work begins. For exterior work or simple repairs, some companies may allow access without you there, so ask when you schedule.
Should I clean the bathroom or kitchen before a plumber visits?
You do not need to deep clean, but a tidy workspace helps. Clear counters, remove personal items from under the sink, and wipe up standing water so your plumber can see the pipes and work safely. In bathrooms, remove bath mats, toiletries, and anything blocking the toilet or shower drain. A clean, clear area reduces the chance of lost tools or damaged belongings and helps your plumber focus on the repair instead of navigating clutter.
How do I shut off my water in an emergency?
Find your main water shut off valve, usually near the water meter, in a basement, crawlspace, or utility closet. Turn the handle clockwise until it stops. For fixture-level issues, look for a shut-off valve under the sink or behind the toilet and turn it clockwise. If you cannot find the valve or it will not turn, call a licensed plumber right away. Knowing this before an emergency saves water damage and gives you control while you wait for help.
