

How to Stop Water Leak Under Sink: 2026 Fix-It Guide

Table of Contents
- Quick Steps to Stop Water Leak Under Sink Right Now
- Plumbing Leak Repair Tools You Will Need
- How to Find the Source of the Leak Under Your Sink
- Fixing a Leaking P-Trap: Step by Step
- Signs of a Leaking Supply Line and How to Fix It
- Preventing Water Damage Under Kitchen Sink
- When to Call a Professional Plumber
- Frequently Asked Questions
Last Updated: October 2, 2026
Quick Steps to Stop Water Leak Under Sink Right Now
To stop water leak under a sink fast, shut off the supply valve first, then dry everything and trace the source.
Water under a kitchen sink rarely fixes itself. Left alone, it warps cabinet floors, feeds mold, and can rot the subfloor. Most leaks are simple to trace once you know where to look.
Turn Off the Water Supply
Close the two shutoff valves under the sink by turning them clockwise until they stop. If they won’t budge or feel stuck, shut off the main water valve for the house instead. Then open the faucet to drain the lines and confirm the water has stopped.
Dry and Inspect the Area
Dry every surface with a towel or paper towels, including the back wall and cabinet floor where water hides. Then watch for fresh drips. A dry cabinet makes the leak easy to spot.
Plumbing Leak Repair Tools You Will Need
Gather a few basic tools before you start. You likely already own most of them.
- Adjustable wrench or channel-lock pliers
- Bucket and old towels
- Flashlight or phone light
- Plumber’s tape (Teflon tape)
- New washers or a replacement P-trap kit
- Gloves and safety glasses
Keep a small bucket under the P-trap before you loosen anything. Even after shutting off the supply, the trap holds standing water that will spill the moment it comes apart.
How to Find the Source of the Leak Under Your Sink
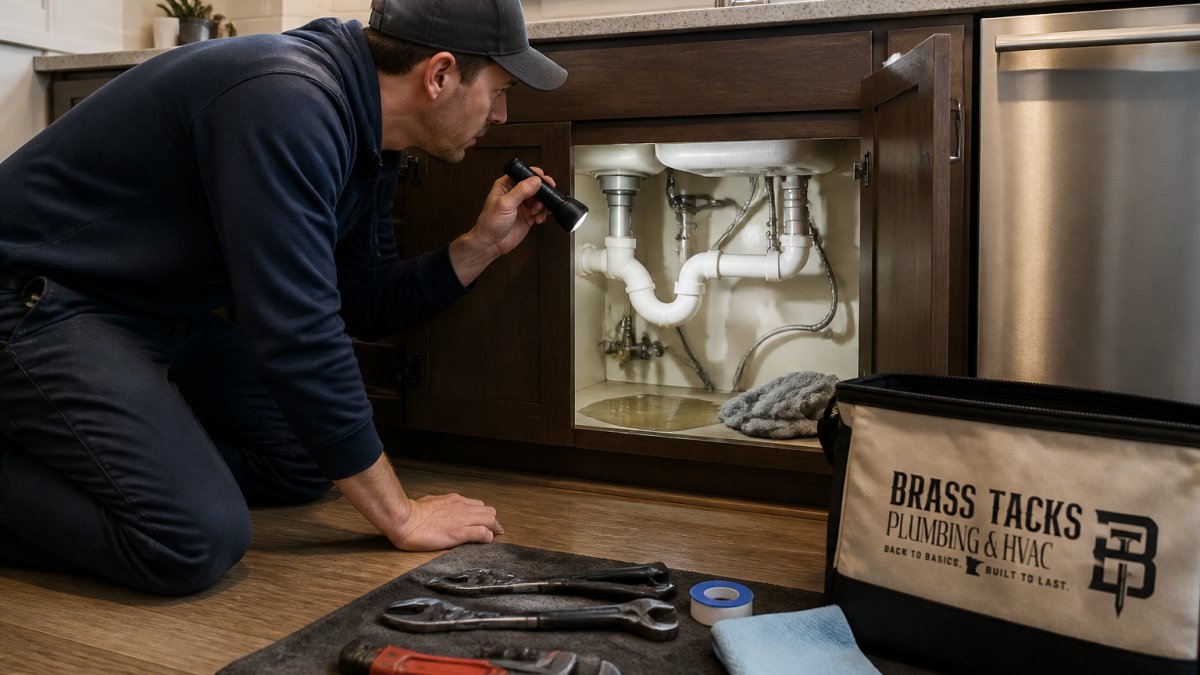
Finding the leak starts with a simple test: dry everything, then run water in stages and watch where it appears. Work in a set order so you are not chasing drips that travel along a pipe before they fall.
Use a Diagnostic Order, Not Guesswork
Work from the top down. Water runs downhill, so a drip at the back of the cabinet may actually start at the faucet base above.
- Faucet and sprayer first. With the faucet off, wipe the base, the handle, and the sprayer hose. A drip here only shows when the faucet is running or right after you shut it off.
- Supply lines next. These are under constant pressure, so a leak shows even with the faucet off. Dry each line and the shutoff valve, then wait two minutes.
- Drain side last. Run the faucet and watch the P-trap slip nuts, the tailpiece, and the connection into the wall. A drip that only appears while water is running points to the drain, not the supply.
If you cannot tell whether the leak is supply or drain, this one question settles it: does the drip stop when the faucet is off?
Match the Symptom to the Likely Part
Most under-sink leaks fall into a handful of patterns. Matching what you see to the part saves time.
- Drip only while the faucet runs: loose P-trap slip nut, worn washer, or a cracked tailpiece.
- Drip with the faucet off: supply line, shutoff valve packing nut, or the faucet cartridge.
- Water that appears after the sink drains: a clogged or partially blocked drain pushing water past a joint, or a venting problem.
- Musty smell with no visible water: a slow weep that is soaking the cabinet floor, often at the trap or the wall connection.
- Water on the cabinet floor but dry pipes: condensation, especially in humid summer months, or a leak from the dishwasher supply nearby.
Check the P-Trap and Drain Connections
The P-trap is the curved pipe that holds water to block sewer gas. Run the faucet and watch the slip nuts.
Check the washers inside each nut. A washer that is flattened, cracked, or installed backward will leak no matter how tight you make the nut.
Inspect the Supply Lines and Shutoff Valves
Supply lines carry pressurized water to the faucet. Wipe each line with a dry tissue and watch for moisture. Check the shutoff valves too.
Run your fingers along the full length of each supply line, not just the ends. A pinhole leak in the middle of a braided line is easy to miss.
What If the Leak Is Coming From Above or Behind?
Not every under-sink leak starts under the sink. Water from a bathroom above, a dishwasher, or a refrigerator ice maker line can travel along a joist and show up in the kitchen cabinet.
- Check the ceiling and the wall behind the cabinet for staining or soft drywall.
- Pull the refrigerator out and check the ice maker supply line.
- If there is a bathroom directly above, check the toilet and tub drain from below.
A leak that shows up in more than one place, or returns after you fix a joint, usually means the source is somewhere other than where the water lands.
A dry paper towel wrapped around a joint is a better leak detector than your eyes. Water wicks into the paper and leaves a clear mark, even for a drip too slow to see.
When the Source Is Not Obvious
If you have dried everything, run each fixture in stages, and still cannot find the source, the leak may be inside a wall or under the floor. That is the point to stop probing and call a plumber. A moisture meter and a small camera can find what a flashlight cannot, and it is far cheaper than repairing a rotted subfloor later. If you are in Plymouth, Wayzata, Minnetonka, or Maple Grove and the source stays hidden, our team can trace it with the right tools. You can read more about our plumbing services or reach out for emergency plumbing if water is actively running.
Fixing a Leaking P-Trap: Step by Step
Fixing a leaking P-trap is the most common under-sink repair. Here is how to do it.
- Place the bucket under the trap.
- Loosen both slip nuts by hand or with pliers.
- Remove the trap and empty it into the bucket.
- Check the washers for cracks or flattening.
- Wrap the threads with plumber’s tape if needed.
- Reassemble the trap and hand-tighten the nuts.
- Run water and check for drips.
If the trap is cracked or corroded, replace it with a new kit. Tighten the nuts snug, not cranked. Overtightening cracks plastic and strips threads.
Signs of a Leaking Supply Line and How to Fix It
Signs of a leaking supply line include moisture on the line, a bulge or blister, and water that appears even when the faucet is off.
Shut off the valve, then unscrew the line from both ends. Take it to the store to match the length and fittings.
Never ignore a bulging or blistered supply line. These fail suddenly, and a burst line under pressure can dump water into your cabinets and floor in minutes.
Preventing Water Damage Under Kitchen Sink
Preventing water damage under a kitchen sink comes down to catching small problems early and reducing moisture.
Why Under-Sink Leaks Cause So Much Damage
A slow drip under a sink is worse than a fast one in some ways. A steady drip soaks the cabinet floor, and that moisture has nowhere to go. Cabinet floors are usually thin particleboard or plywood, and once particleboard swells it never goes back to its original shape.
A Monthly Five-Minute Check
Once a month, open the cabinet, shine a light on every joint, and run your hand along the cabinet floor. Look for:
- Water stains or dark rings on the cabinet floor
- White crusty buildup on fittings, which is a sign of a slow mineral leak
- A musty or earthy smell, which usually means hidden moisture
- Soft or swollen wood at the cabinet base
If everything is dry, close it up. If you find moisture, trace it the same day.
Replace Rubber Supply Lines Before They Fail
Rubber and plastic supply lines have a service life and fail from the inside out. A bulge, blister, or stiff, brittle feel means the line is near the end of its life. Braided stainless lines last longer than plain rubber, but they still have a lifespan.
Watch the Shutoff Valves
Shutoff valves are the parts homeowners touch least and trust most. In older homes, the packing nut dries out and the valve stem starts to weep. If a valve will not turn by hand, do not force it. A valve that breaks while you are trying to close it turns a small repair into a flooded cabinet.
Manage Moisture, Not Just Leaks
A cabinet that stays damp grows mold even without a leak. In humid summer months, cold water running through a supply line can cause condensation that drips onto the cabinet floor. Keep the cabinet aired out and fix any source of standing moisture. A small leak detector or water alarm on the cabinet floor will alert you the first time water shows up, often before you would notice it on your own.
Minnesota Winter and Under-Sink Pipes
Minnesota winters are hard on under-sink plumbing, especially on exterior walls. Pipes in an exterior cabinet sit closer to the cold than pipes anywhere else in the house, and a deep freeze can push them toward freezing even when the rest of the home is warm. During a cold snap:
- Open the cabinet doors so warm indoor air reaches the pipes.
- Let a thin trickle of water run overnight on the coldest nights, especially if the sink is on an exterior wall.
- Keep the home heated, even when you are away.
- If you leave for an extended trip in winter, shut off the water at the main and drain the lines.
A frozen pipe that splits will not leak until it thaws, which is why damage often shows up after the cold breaks. If you suspect a pipe has frozen, shut off the supply and call a plumber before it thaws.
Hard Water and Fitting Wear
Much of the West Metro has hard water, which leaves mineral deposits on washers, valve seats, and supply line fittings. Those deposits wear rubber and brass faster than soft water would, which is one reason under-sink fittings in older Minnesota homes fail sooner than homeowners expect.
Prevention is not about one big fix. It is a monthly look, replacing supply lines on a schedule, keeping the cabinet dry, and paying attention to how Minnesota cold and hard water treat the pipes under your sink.
If you would rather have a plumber check your under-sink plumbing before winter, or want a second opinion on a valve or supply line that looks questionable, our team can help. Learn more about our plumbing services or reach out for emergency plumbing if water is actively running.
When to Call a Professional Plumber
Call a professional plumber when the leak returns after a repair, when you see water coming from inside a wall or floor, or when a shutoff valve is stuck or broken.
Signs it is time to call:
- Water stains on the ceiling below the sink
- A sewer smell that will not go away
- Repeated leaks at the same joint
- A cracked or corroded pipe you cannot reach
If you are in Plymouth, Wayzata, Minnetonka, or Maple Grove and the leak keeps coming back, our team can trace it and fix it right. Learn more about our plumbing services or reach out for emergency plumbing when water is actively running.
Frequently Asked Questions
What is the main cause of a water leak under the sink?
The most common causes are loose drain connections, worn-out washers in the P-trap, or a failing supply line. In Minnesota homes, rapid temperature changes can cause pipes and fittings to expand and contract, leading to small leaks. Start by checking the P-trap and supply lines first. If you see water dripping from a specific joint, tighten it gently. If the leak continues, the part may need replacement. For persistent leaks, call a licensed plumber to avoid further damage.
Can I fix a leaking sink myself, or should I call a plumber?
Many minor leaks, like a loose P-trap or a worn washer, are DIY-friendly if you have basic tools and feel comfortable. However, if the leak is behind a wall, involves a cracked pipe, or you cannot find the source, it is best to call a professional. In the West Metro, Brass Tacks Plumbing, Heating & Cooling offers honest assessments and upfront pricing. They can diagnose the issue and recommend the right fix without unnecessary replacements.
How do I prevent water damage under my kitchen sink?
Preventing water damage under kitchen sink starts with regular checks. Inspect under the sink monthly for moisture or discoloration. Replace old supply lines every 5-7 years, especially in older Plymouth homes. Install a water leak detector or a drip tray. Fix small leaks immediately. Keep the cabinet dry and ensure good ventilation. If you have a water softener, check its connections too. These steps protect your cabinets and floor from costly damage.
What tools do I need to repair a leaking pipe under the sink?
For most under-sink repairs, you will need an adjustable wrench, pliers, a bucket, a flashlight, and a towel. A pipe wrench helps with stubborn fittings. Teflon tape and replacement washers are useful for sealing threads. If you are fixing a leaking P-trap, a screwdriver may be needed to loosen the slip nuts. For supply line issues, a new braided line and wrench are essential. Always turn off the water before starting.
A leak under the sink is easy to ignore until the cabinet floor starts to swell. If you have tightened the trap, replaced the supply line, and the water still shows up, the cause is likely deeper in the system. Brass Tacks Plumbing, Heating & Cooling offers honest recommendations, upfront pricing, and licensed technicians who respect your home. Get started with Brass Tacks Plumbing, Heating & Cooling and get your under-sink plumbing dry and dependable again.
