

How to Fix a Leaky Water Heater: Step-by-Step Guide

Table of Contents
- Fix a Leaky Water Heater: First Steps to Stop the Water
- Find the Source of the Leak: A Quick Diagnostic Guide
- Common Causes of Water Heater Leaks and How to Fix Them
- Water Heater Pressure Relief Valve Leaking: What to Do
- When a Leak Means Tank Failure: Signs of Water Heater Failure
- Prevent Future Leaks: Water Heater Maintenance Tips
- When to Call a Professional for a Leaky Water Heater
- Frequently Asked Questions
Last Updated: September 8, 2026
A leaky water heater can ruin flooring, drywall, and belongings within hours, but not every leak means you need a new tank. In many cases, the fix is simple and safe for a homeowner, like tightening a connection or replacing a valve. This guide walks you through how to fix a leaky water heater step by step, starting with the most urgent actions to stop the water, then moving into diagnosis and repair.
Fix a Leaky Water Heater: First Steps to Stop the Water
The first priority is stopping the flow of water. Shut off the water supply and the power source before anything else. Acting quickly can mean the difference between a small puddle and a flooded basement, especially for Minnesota homes where water heaters often sit in unfinished basements.
Shut Off the Water Supply and Power
Start by turning off the cold water supply line. Look for the shut-off valve on the pipe entering the top of the tank, usually a red or blue handle. Turn it clockwise until it stops. Next, shut off the power: for an electric water heater, switch off the breaker in your electrical panel; for a gas water heater, turn the gas control valve to the “pilot” or “off” position. Do not skip this step, because a tank that runs dry while still heating can suffer serious damage to its heating elements or gas control valve.
Assess the Water Damage and Protect Your Home
Once the water is off, assess the damage. Move valuable items away from the area and use towels, a wet-dry vacuum, or a sump pump to remove standing water. Place a bucket under the leak if it is dripping steadily. Water damage can warp wood and breed mold quickly, so the Federal Emergency Management Agency guidance on water damage cleanup recommends drying the area thoroughly within 24 to 48 hours. If the leak is large or the water has spread to multiple rooms, you may need to call a professional for water damage mitigation before you tackle the heater itself.
Find the Source of the Leak: A Quick Diagnostic Guide
A leaky water heater can lose water from several points, and the source determines whether you can fix it yourself or need a new tank. Dry the tank and the floor around it completely, then watch where the water reappears. This simple test takes ten minutes.
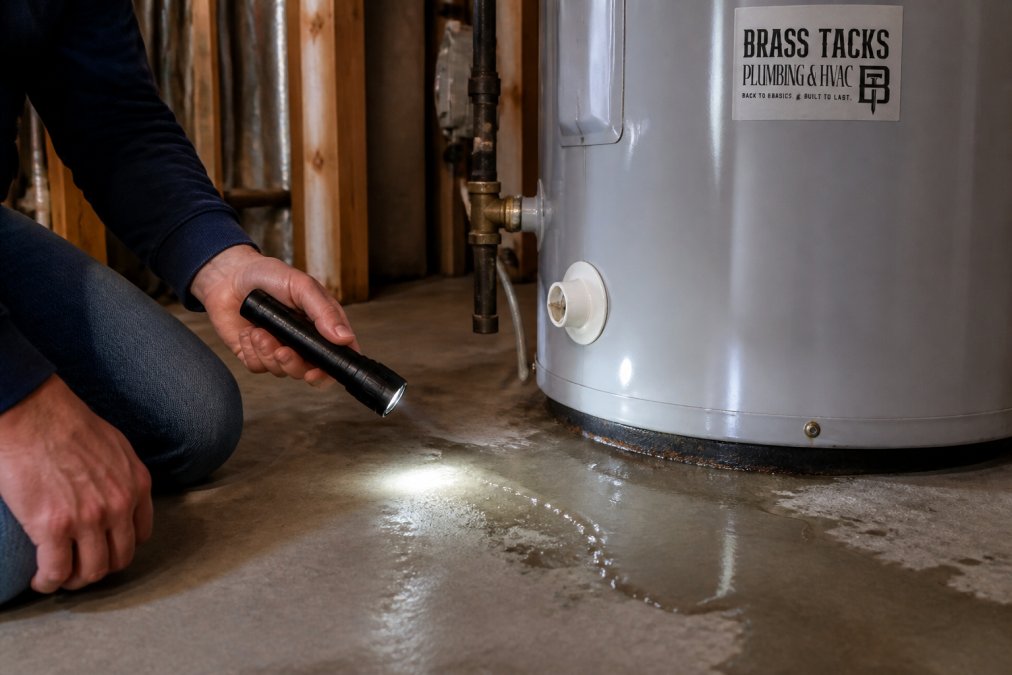
Step 1: Is the leak on the floor or on the tank itself?
If the water is on the floor, not on the tank: Move to Step 2.
If the tank body is wet or rusted: Run your hand along the side of the tank. Moisture on the lower third, especially with rust streaks or bulging, points to internal tank corrosion, which is not repairable. A wet tank with no visible rust could be condensation, common in Minnesota summers when humid basement air meets a cold tank surface. Wipe it dry and check again in an hour.
Step 2: Where exactly is the water pooling?
Water at the top of the tank, dripping down the pipes: This is almost always a loose plumbing connection or a worn gasket on the cold water inlet or hot water outlet. Feel around the base of each fitting for moisture. If the pipes are dry but the top of the tank is wet, the leak could be coming from a seam, which is rare but indicates tank failure.
Water pooling directly under the drain valve: The drain valve is the small spigot near the bottom. Touch it. If it is wet, try tightening the valve with a wrench. If the drip continues, the valve’s rubber washer is likely worn and the valve needs replacement.
Water dripping from the temperature and pressure (T&P) relief valve discharge pipe: This pipe is usually a white or copper pipe running from the side of the tank down toward the floor. A few drops during a heating cycle can be normal. A steady drip or a continuous flow means the valve is opening. This could be a faulty valve or excessive pressure in the tank.
Water pooling at the base with no obvious source above: This is the most serious finding. If the tank, drain valve, and T&P valve are all dry, the water is coming from a pinhole leak in the tank itself. This is internal corrosion and the tank must be replaced.
Step 3: Does your fuel type change the diagnosis?
Yes. The source of a leak can differ based on whether you have a gas or electric unit.
For gas water heaters: Check the flue pipe (the metal pipe exiting the top of the tank). If it is wet, you may have condensation inside the flue, a venting issue, not a tank leak. Also inspect the gas control valve, the box-like unit where the gas line connects. If you see water dripping from it or smell gas, turn off the gas supply immediately and call a professional.
For electric water heaters: The heating elements are accessed through panels on the side of the tank. A leaking element gasket can cause water to run down the side and pool at the base, mimicking a tank failure. If you see water near the access panels, you may have a loose element or failed gasket. This is repairable, but it requires shutting off power and draining the tank.
Step 4: Is the leak constant or only during heating?
A leak that only appears during or right after a heating cycle often points to thermal expansion. As water heats, it expands. In a closed plumbing system, this increased pressure has nowhere to go, causing the T&P valve to open and release water. If the leak is constant, it is more likely a mechanical issue like a worn valve or a loose fitting.
Most homeowners can pinpoint the source within 15 minutes. Once you know where the water is coming from, you can decide whether the fix is a simple DIY project or a call to a licensed plumber.
Common Causes of Water Heater Leaks and How to Fix Them
A water heater leak usually comes from one of a handful of common sources. Each has a different fix, ranging from a simple wrench turn to a part replacement. Match the symptom to the solution below.
|
Leak Source |
What You’ll See |
Typical Fix |
Difficulty |
|---|---|---|---|
|
Plumbing connections |
Water at the top, on inlet or outlet pipes |
Tighten fittings or replace pipe tape |
Easy |
|
Drain valve |
Water pooling at the base, dripping from valve |
Tighten or replace the valve |
Easy |
|
T&P relief valve |
Water from the discharge pipe, often during heating |
Replace the valve or check pressure |
Moderate |
|
Tank corrosion |
Rust, moisture, or water on the tank body |
Replacement required |
Professional |
Fixing Leaks at the Plumbing Connections
The most common and easiest leak to fix is at the plumbing connections on top of the tank: the cold water supply line and the hot water outlet pipe. Use a wrench to tighten the connections gently, but do not overtighten, as this can strip threads or crack fittings. If the leak persists, the thread seal tape may be worn. Turn off the water, disconnect the pipe, apply fresh plumber’s tape, and reconnect it.
Dealing with a Faulty Drain Valve
The drain valve is the small spigot near the bottom of the tank and a common source of slow drips. Water pooling directly under it usually means it is not sealing completely. First, try tightening it with a wrench. If it still leaks, replace it by draining the tank below the level of the valve, unscrewing the old one, and installing a new brass valve with thread seal tape. Take care to avoid stripping the threads on the tank.
Water Heater Pressure Relief Valve Leaking: What to Do
A water heater pressure relief valve leaking is often confused with a tank failure. The temperature and pressure relief valve, or T&P valve, is a safety device that opens to release water if pressure or temperature inside the tank gets too high. A few drops during a heating cycle can be normal, but a constant or heavy flow is a problem.
The fix depends on the cause. If the valve is simply old or faulty, it needs to be replaced, which is a job a handy homeowner can do with the right parts. However, if the valve is opening because the tank pressure is genuinely too high, replacing the valve will not solve the issue. High pressure can be caused by thermal expansion, where water expands as it heats and has nowhere to go. Homes with closed water systems often need an expansion tank to absorb this pressure. Per the American Society of Plumbing Engineers technical resources, thermal expansion control is a standard requirement in closed-loop plumbing systems. If you are unsure which situation you have, test the pressure at a cold faucet with a water pressure gauge. If it reads above normal household pressure, call a professional to assess the system.
When a Leak Means Tank Failure: Signs of Water Heater Failure
Not every leak is repairable. The most serious cause of a leaky water heater is corrosion inside the tank itself, and no amount of patching will fix it. A glass-lined tank protects the steel from rust, but sediment buildup and normal wear can compromise that lining over time.
Watch for these signs of water heater failure:
- Water pooling at the base of the tank with no obvious source from the valves or connections
- Visible rust or corrosion on the outside of the tank body
- A puddle that reappears even after you dry the floor and tighten all fittings
- The tank is more than 10 to 12 years old, which is the typical water heater lifespan
- Discolored or rusty water coming from the hot water taps
If you see any of these, the tank integrity is compromised. Continuing to run a corroded tank risks a sudden, catastrophic failure that can release dozens of gallons of water into your home. At this point, the practical solution is a full replacement, not a repair.
Prevent Future Leaks: Water Heater Maintenance Tips
The best way to handle a leaky water heater is to prevent it. Regular maintenance is simple and inexpensive, and most homeowners can handle these tasks in under an hour once or twice a year.
- Flush the tank annually: Connect a garden hose to the drain valve and run the other end to a floor drain or outside. Turn off the power or gas, open the pressure relief valve, and drain a few gallons until the water runs clear. In Minnesota, where groundwater is hard in many areas, sediment builds up faster, so flushing in the fall before heating season helps the unit work efficiently all winter.
- Test the T&P valve: Place a bucket under the discharge pipe. Lift the lever on the valve briefly and let it snap back closed. You should hear a gurgle of water flowing through the pipe. If water continues to drip after you release the lever, the valve needs replacing. Test this valve every six months.
- Check the anode rod: This sacrificial metal rod attracts corrosion to protect the tank lining. Inspect it every two to three years. Turn off the power or gas, shut off the cold water supply, and drain a few gallons. The rod is usually accessible through a hex-head plug on the top of the tank. If it is coated in calcium or has deteriorated to a thin wire, replace it.
- Inspect connections: Look at the plumbing connections and valves for any signs of moisture or rust during your seasonal checks. Tighten any loose fittings gently.
Protect Your Home While You Work
While you diagnose or repair a leak, take a few minutes to protect your home. Water can travel along floor joists and soak into drywall before you notice it. Here is what to do while you wait:
- Move everything off the floor: Clear the area around the water heater. Cardboard boxes, stored holiday decorations, and cleaning supplies will absorb water and can be ruined within minutes.
- Create a water barrier: If your water heater sits in a finished area, lay down a plastic tarp or a waterproof mat around the base of the tank. Tuck the edges under the tank to direct water away from walls and toward a floor drain if you have one.
- Check for hidden moisture: After drying the visible puddle, run your hand along the baseboards and drywall within a few feet of the tank. Drywall acts like a sponge, and moisture can wick up the wall without being visible for days. If the drywall feels damp, cut out the affected section and let the wall cavity dry completely to prevent mold growth.
- Document the damage: Take photos of the leak, the water heater, and any water damage before you begin repairs. These photos are useful for insurance claims and for the plumber who may need to see the original condition of the unit.
When to Call a Professional for a Leaky Water Heater
If your diagnostic steps point to tank failure, or if you are not comfortable working with gas lines, electrical connections, or high water pressure, call a professional. A licensed technician can confirm the source of the leak, test the system’s pressure, and recommend whether a repair or replacement is the better investment. Guessing wrong can lead to property damage or a safety hazard.
For homeowners in the Twin Cities West Metro, including Plymouth, Wayzata, Minnetonka, and Maple Grove, Brass Tacks Plumbing provides upfront pricing and honest recommendations without sales pressure. Our licensed technicians handle everything from a simple valve replacement to a full water heater replacement. If you are seeing signs of water heater failure or want a professional opinion, schedule a service visit and get a clear answer before spending money on parts or a new unit.
A leaky water heater is stressful, but a calm, methodical approach will protect your home and wallet. Start by shutting off the water and power, then dry the area and find the exact source of the leak. Many leaks are simple fixes like tightening a connection or replacing a valve, but a corroded tank requires full replacement. When in doubt, a professional inspection gives you clarity. Contact Brass Tacks Plumbing to schedule your water heater service.
Frequently Asked Questions
Can a leaky hot water heater be fixed?
Yes, many leaks can be fixed depending on the source. Leaks from plumbing connections, the drain valve, or the temperature and pressure relief valve are often repairable with basic tools. However, a leak from the tank itself, often caused by corrosion and rust, usually means the tank has failed. In that case, water heater replacement is the safer and more practical option, as welding or patching a tank is not a reliable long-term fix.
How do I get my water heater to stop leaking?
First, stop the flow of water by shutting off the cold water supply valve on top of the unit. Then, turn off the power or gas supply. Next, identify the leak’s source. If it’s from a connection, tighten it. If it’s from the pressure relief valve, it may need replacing. If the leak is coming from the tank itself, you must turn off the water and call a professional, as this indicates tank failure.
How long will a water heater last once it starts leaking?
If the leak is from a loose fitting or a faulty valve, the water heater can last for years after a simple repair. However, if the leak is from the tank itself due to internal corrosion, the lifespan is very short. Once a tank starts leaking, it will only get worse, and you risk significant water damage. In this case, prompt water heater replacement is necessary to protect your home.
Is a leaking water heater an emergency?
Any leaking water heater should be addressed promptly to prevent water damage, but a leak from the tank itself is a true emergency. A tank leak can release large amounts of water quickly, damaging floors, walls, and belongings. If you see a steady stream or pooling water from the tank, shut off the water supply and power immediately and call an emergency plumber. A slow leak from a valve is less urgent but still requires timely repair.
